


Hey! Nicole here! Please note that some of the links provided in this article are affiliate links. This means I may receive a small commission at no extra cost to you if you make a purchase through these links. I only recommend products or services I personally use and trust. Your support helps to keep my small business running. Thank you! ♡
DIY Vellum Wrapped Wedding Suites at Home
Love the look of vellum wrapped wedding suites? Same here! They're all kinds of elegant, and I can't get enough. The best part? You'd be surprised how simple they are to make.
No, really! And guess what? You can DIY the whole thing from home. Better still, it's lighter on the pocket than it looks (yet it screams 'fancy').
So, let's roll up our sleeves and get crafty!
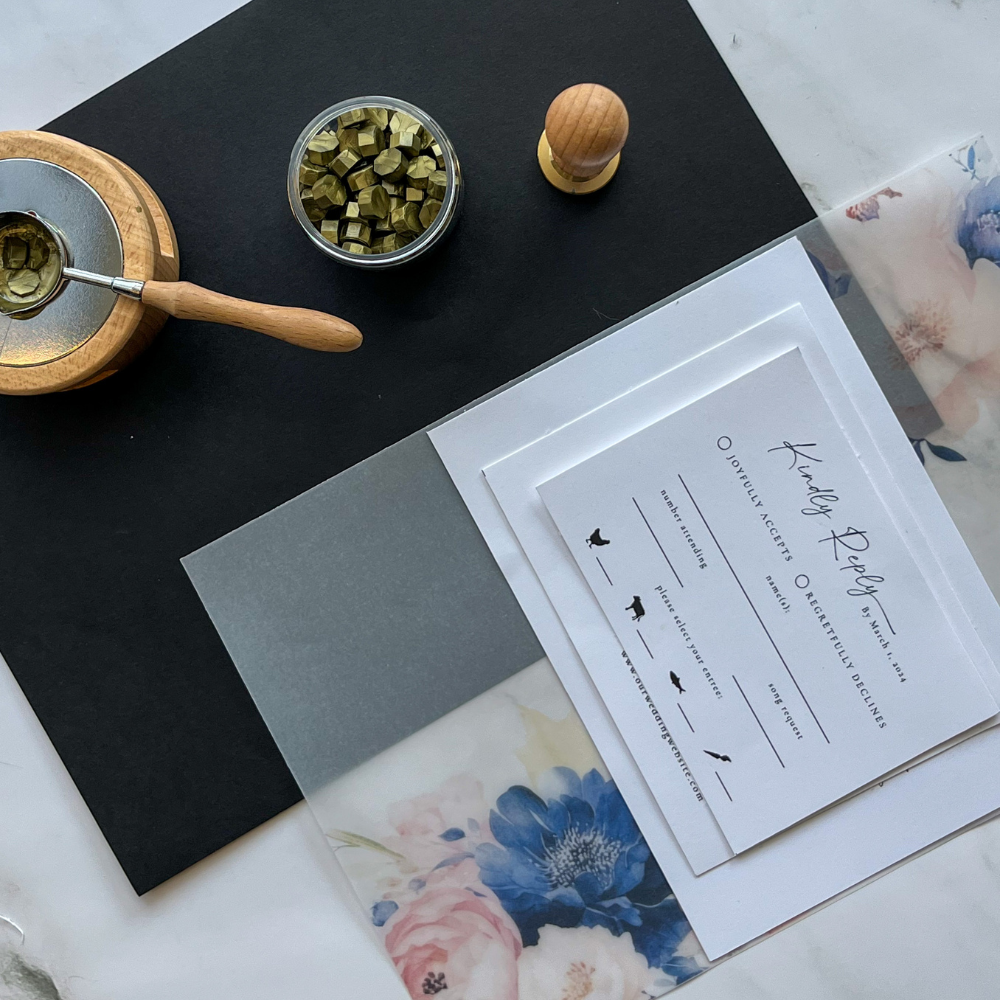
Materials you will need:
Prepping your invitations and vellum wrap

This is where it all begins. Start by editing your items according to your design preferences to match your event theme and personal style. Once satisfied, it's time to print. Remember, if you're planning to manually cut out your invites, make sure to download your design as a PDF with the "show trim marks" option enabled.
Now, the vellum wrap. Print it out on vellum paper and be patient. Let the ink dry fully before you handle it. Patience is key here. Ink on vellum can smudge very easily!
You can download the vellum wrap used in this tutorial HERE
PRO TIP: Encountering issues with the printer not recognizing the vellum paper? That’s common due to its lightweight nature. Try adding an 80lb cardstock to the printer tray - it works wonders!
Now that your vellum wrap and invites are ready, it's time to trim to size. I personally prefer using a paper cutter for this task, but scissors work just as well! Trim along those marks for a nice, even cut.
ASSEMBLING YOUR INVITES WITHIN YOUR VELLUM WRAP
With your invites and vellum wrap neatly trimmed, let's dive into the fun part!
To start, you'll need to heat your wax. Simply light up a tea candle under your wax warmer. Add about 2-3 wax beads into the spoon and place it over the flame. As you let the wax slowly melt, it's time to assemble your invites and vellum wrap.
The ideal order? Think of it in terms of size - go from large to small. Place the vellum wrap first, followed by the invitation, the details card and finally the RSVP card on top.
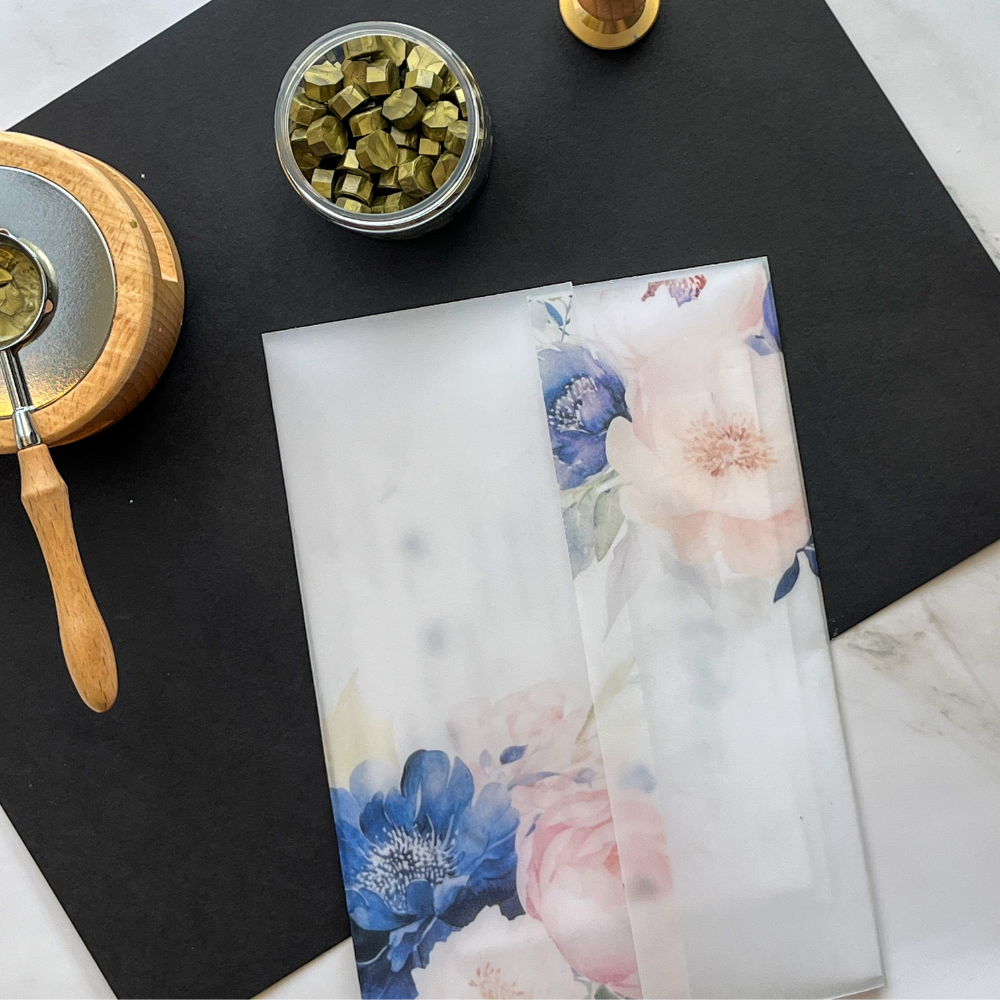
Folding the vellum can be a little tricky, but bear with it. It gets easier with practice. Position your invite stack in the middle of the vellum sheet. Keep it steady with one hand, and use the other to fold the wrapper tightly around the stack. Repeat this for the other side. You will notice that one side of the wrapper is longer - neatly tuck this under the shorter side for a clean, centered look.
tie it all together with a wax seal
At this point, your wax should be transformed into a silky liquid. It's a moment to exercise extreme caution.
Before we dive in, I want to underscore a critical safety note: Please be extra vigilant to prevent contact with hot wax, heated metal, flame, or any heat-related items. Contact with these could lead to significant injury.
To safeguard your workspace from potential wax spills or heat damage, I recommend setting down a protective layer. A sheet of 80 lb cardstock works wonders here, but use whatever you have at hand!
Gently pour the warm wax over the center of the wrap, making sure it covers both flaps of the vellum wrap. It's a delicate balance between enough to hold the seal but not too much that it looks messy.
Once you've achieved a nice pool of wax, it's stamping time! Press your stamp onto the melted wax. Keep it steady for about 10-15 seconds, then lift it off in one clean, swift motion. Remember, pulling it straight up will give you the best result!

SAFELY CLEAN UP
We're all about safety here! Always remember to clean your wax seal spoon after each use. The best way to do this is by wiping the spoon with a damp paper towel while the wax is still liquid - it can be a little tricky, but it prevents potential issues when reheating wax later on.
Never place your wax seal spoon anywhere other than on the warmer to prevent damaging your workspace from burns.
And last but certainly not least, avoid any contact between your skin and hot wax or metal. These can cause serious injuries, so please be extra cautious when working with them. Here's to a safe and creative DIY journey!
Embrace the Process! vellum paper and wax can be tricky
With a bit of practice, you'll be a master of this process! It's an easy, creative way to add that personal touch to your invites. It might take a few tries to get it right, but that’s all part of the fun. And once you do get the hang of it, you'll see how it truly elevates the look of your invites. Just remember - it’s okay to stumble at first.
Before you know it, you'll be wax-sealing like a pro! Enjoy the process and let your creativity flow.
To show you that every artisan starts somewhere, here's a snapshot of my own journey - my very first, not-so-perfect wax seals!

in summary...
There you have it - a complete guide on how to create a stunning vellum wrapper with a wax seal for your wedding invitations.
It may seem a little daunting at first, but remember, practice makes perfect! It's all about enjoying the process and allowing your creativity to shine. So go on, roll up your sleeves and start creating! These personal touches not only make your wedding invites uniquely yours but they also create a beautiful first impression of your upcoming celebration.
Don't forget to sign up for my newsletter if you found this article useful and would like to see more! You'll be the first to get updates on new blog posts, upcoming workshops, exclusive discounts, and more. Just sign up HERE to join our community of DIY enthusiasts and event planners! Can't wait to connect with you!
Happy crafting!
